Adaptation of a 30 years old Minolta MC Rokkor 58 mm f 1.2 SR mount lens, to Canon EF mount for EOS cameras - especially for the EOS 5D DSLR

I searched for some time extremly fast lenses for my camera:
I was interested in the Canon FD (or New FD) 50/1.2 or 55/1.2 types (normal, L or aspherical), the Olympus Zuiko 55 mm / 1.2 or an old Minolta 58mm /1.2.
The Canon FD telephoto 85 mm / 1.2 L were equally interesting, but even with marks and scratches they do not slip into a comfortable price region. Despite a Zeiss 85 / 1.4 lens, the Canon is still attractive. Especially since I still want to convert other Canon FD lenses on Canon EF.
Well, I found this beautiful Rokkor 58 / 1.2 for about 175 Euros (December 2009) I could buy it.
Very good looking, with tiny bubbles in the glass or dust. I don´t think it is fungus.
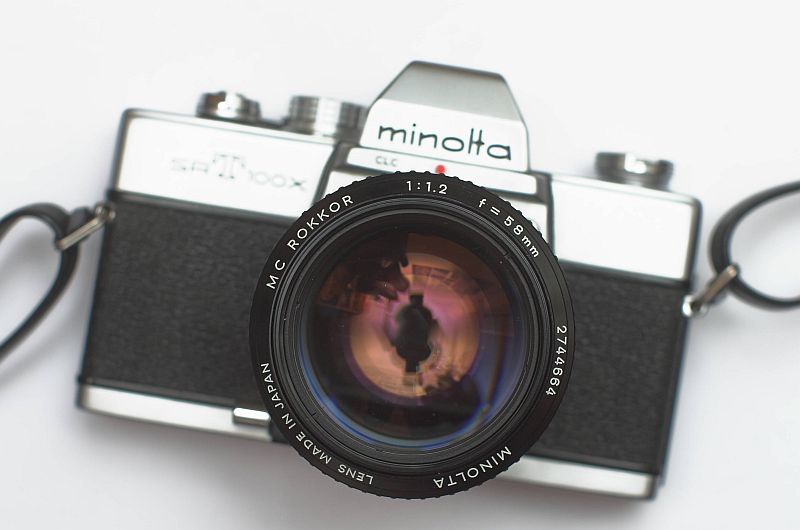
First a picture of this lens on a camera for which it was constructed, a Minolta SRT 100X.
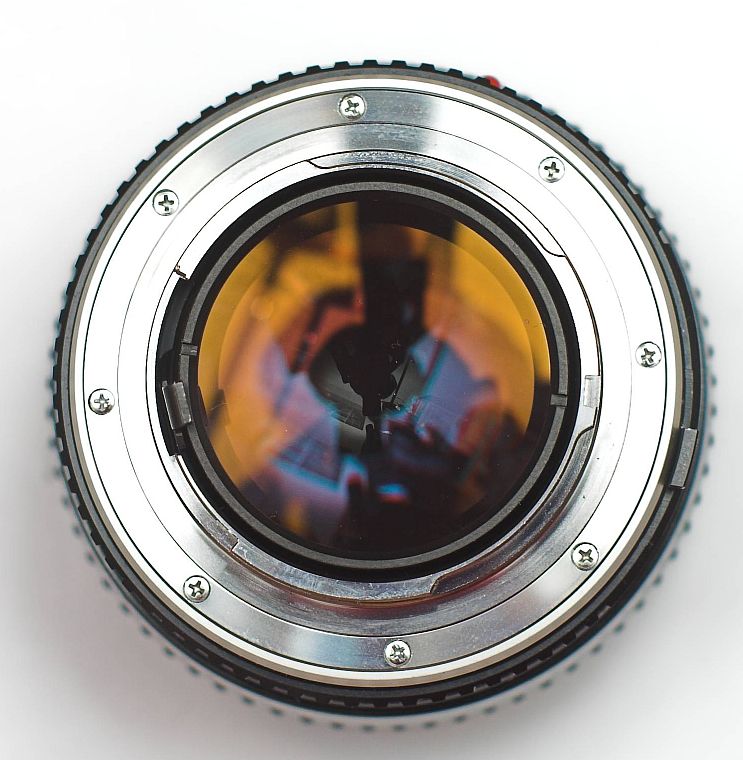
Below is a picture of the bayonet and the big rear lens - I believe on Sigma AF cameras, the bayonet would be vignetting, if ever a reconstruction is possible while maintaining the infinity setting. M42 looks almost too tight, a M42 extension ring does not fit through the tube of the rear.
First, the mount is unscrewed:

The bolts have a different length, I got the mount holes with long screws marked

Then, the Minolta SR mount ring (often referred to as Minolta MD bayonet) coul be put away, and one can remove the aperture transfer ring, along with beads and arc segments. Thereafter, the washer will be removed - this later becomes infinitely adjusting filed.


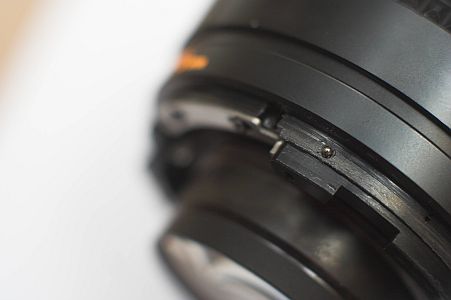
The aperture ring must be removed, while you should pay attention to the whereabouts of the aperture detent ball and spring.
The knob below the 5.6 on the aperture ring must away to fit the EF mount. I sawed that away.

Now you have to adapt the aperture ring back to the lens - I have first the iris operator mountet, as shown in the pictures bellow . And do not forget to keep the ball that stops the aperture ring.


A defective Tamron zoom lens with Canon EF bayonet serves as an organ donor. The bayonet is unscrewed, the electrical contact strip as well. In order to mark where is up with the bayonet-mounted, I have it set to a cheap camera and marked.


Here the camera side bayonet. Left for Canon EF, Minolta SR right. The right withl the marks where were the longer screws were - which will be then transferred to the EF lens mount. On the EF mount is flag which point is up.

Here are the backs of the bayonet-rings. Canon EF left again.
On the Minolta SR-Bayonet on the right, you can see above, a mark - this is for me the position of the red point (which is up when the lens is mounted), but should in fact the position of the aperture index (which should be up when the lens is completly mounted). Learn more about this in the next picture.

I have glued the two rings one above the other to drill the holes of the Minolta lens with the Canon EF bayonet.
However, I have made a mistake here: On Minolta SR / MD bayonet you see a mark above, this should actually be the position of the aperture index, that is the position at the top of the assembled lens. But I have the red marks on the bayonet marked as the up position and so this is my top, the aperture index is on the right side of the camera.
The two rings I have a temporary glued (with hot melt glue) to drill the holes exact as possible.

Here's a picture of drilling. Diameter of the drill = outer screw diameter, I think 1.5 mm - but better measure it!
After drilling, the rings are separated.

Unfortunately my holes are not exactly at the desired position. This I had to compensate with a Dremel.
Now one can mount the bayonet to experiment with the lens.

Now we start the infinity adjustment - and the reduction of all lens parts that could interfere with the mirror of the Canon EOS 5D.
Since we do not have the aperture lever any more, it is only the casing that holds the last lens / lens group. This is too long for the use of the lens on a full frame DSLR like the Canon EOS 5D.
To test whether parts affect the lens at infinity setting I devised the method on that page. That page is in German, please take a look at the pictures: A cheap old Canon EOS 500n is equipped with one or better two layers of insulating tape on the mirror edge. This simulates the Canon EOS 5 D mirror more or less exactly.
The washer shown below can now be filed down, as long as necessary to get infinity focus. It should be filed down as parallel as possible. Anyone who has a suitable lathe, is at a clear advantage. I held the file and moved the ring over the file, and turned the ring further every few strokes. Such a result imply one has to dismantle the lens and use the file again.

The further the lens protrudes now into the camera to get the infinity focus, the more the last lens housing has to be filed down. That is made best with dismanteld lens hounsing. To do this you could use a spanner wrench, or as a cheap substitute a old heavy caliper which you have to grind a bit beforehand.
A precise fine adjustment of infintiy focus is written here by Jim Buchanan - this can be done even later, without major disassembly.


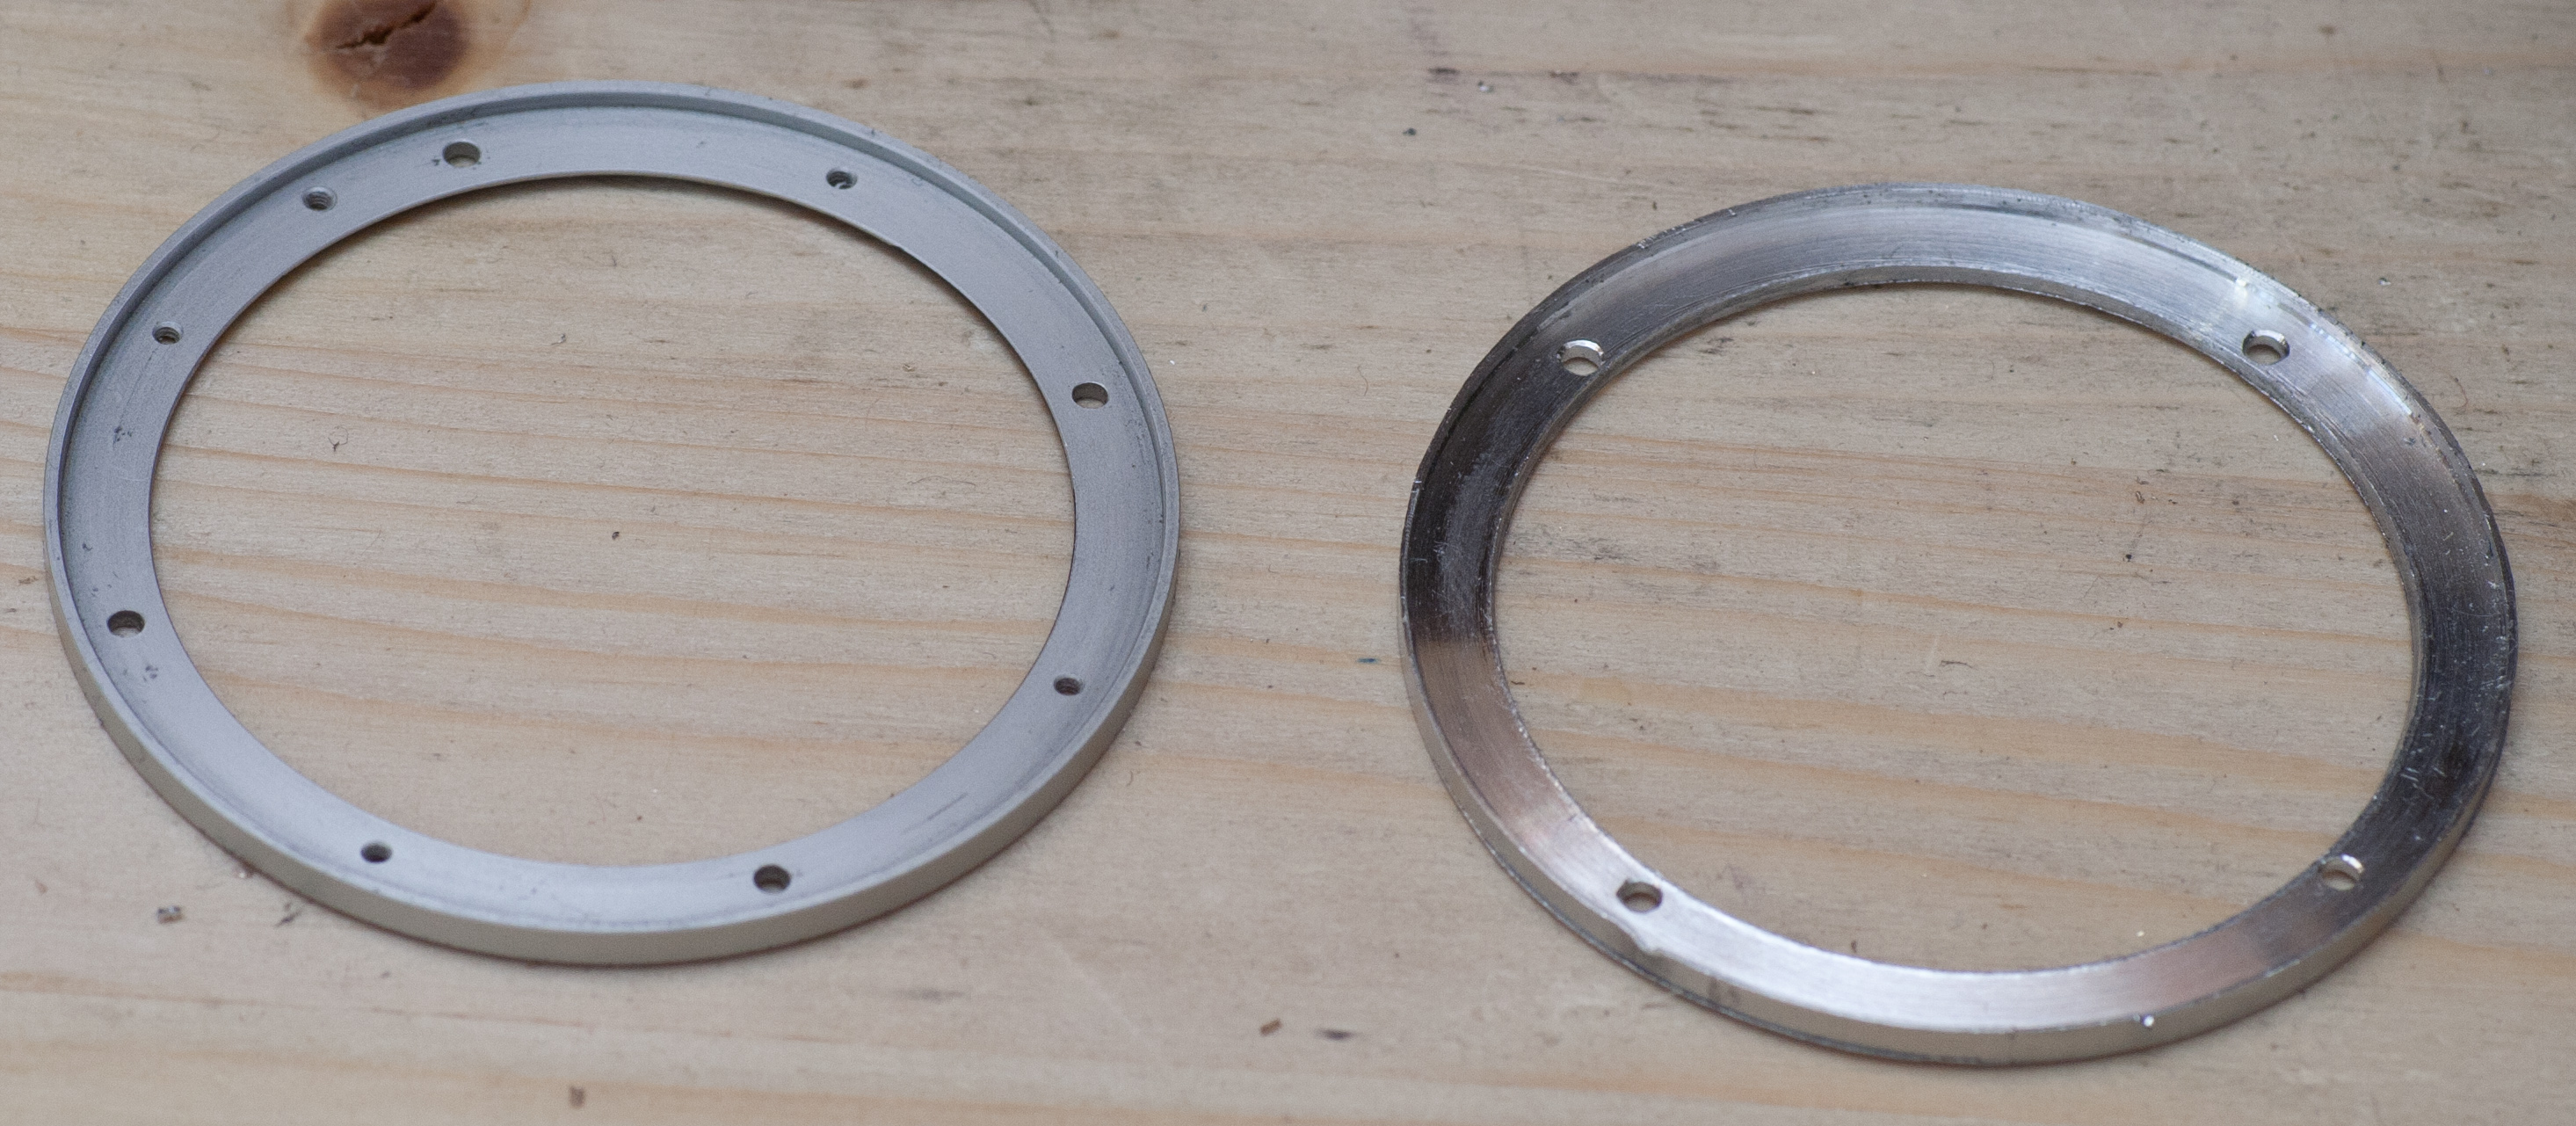
Here an image of my filed down back lens retainer ring, and the depth measuremt bar of my caliper. It has a width of 2mm and a thickness of 1.2mm. The rim of the back lens is only 0.4mm thick - and allows infinity setting on an Canon EOS 5D camera.

After the mount conversion my lens looks like that. Your lens should look a bit different - as long you have not copied my failures. Before the final use of the lens, I wiped away my marks on the lens, and blackened the housing of the last lens.

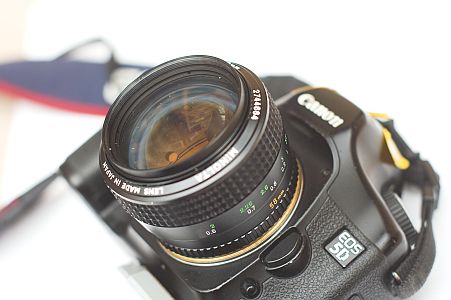
Furthermore I made an nearly ideal hood for my lens - with wanted vignetting wide open - so I have not to add vignetting in Lightroom

Here are two test images shot with this lens at open aperture with a Canon EOS 5D
The quality is sufficient for my purposes - I hope to get the possibility to compare the Rokkor with corresponding new lenses.
With closed iris the quality is increasing.
Small Update:
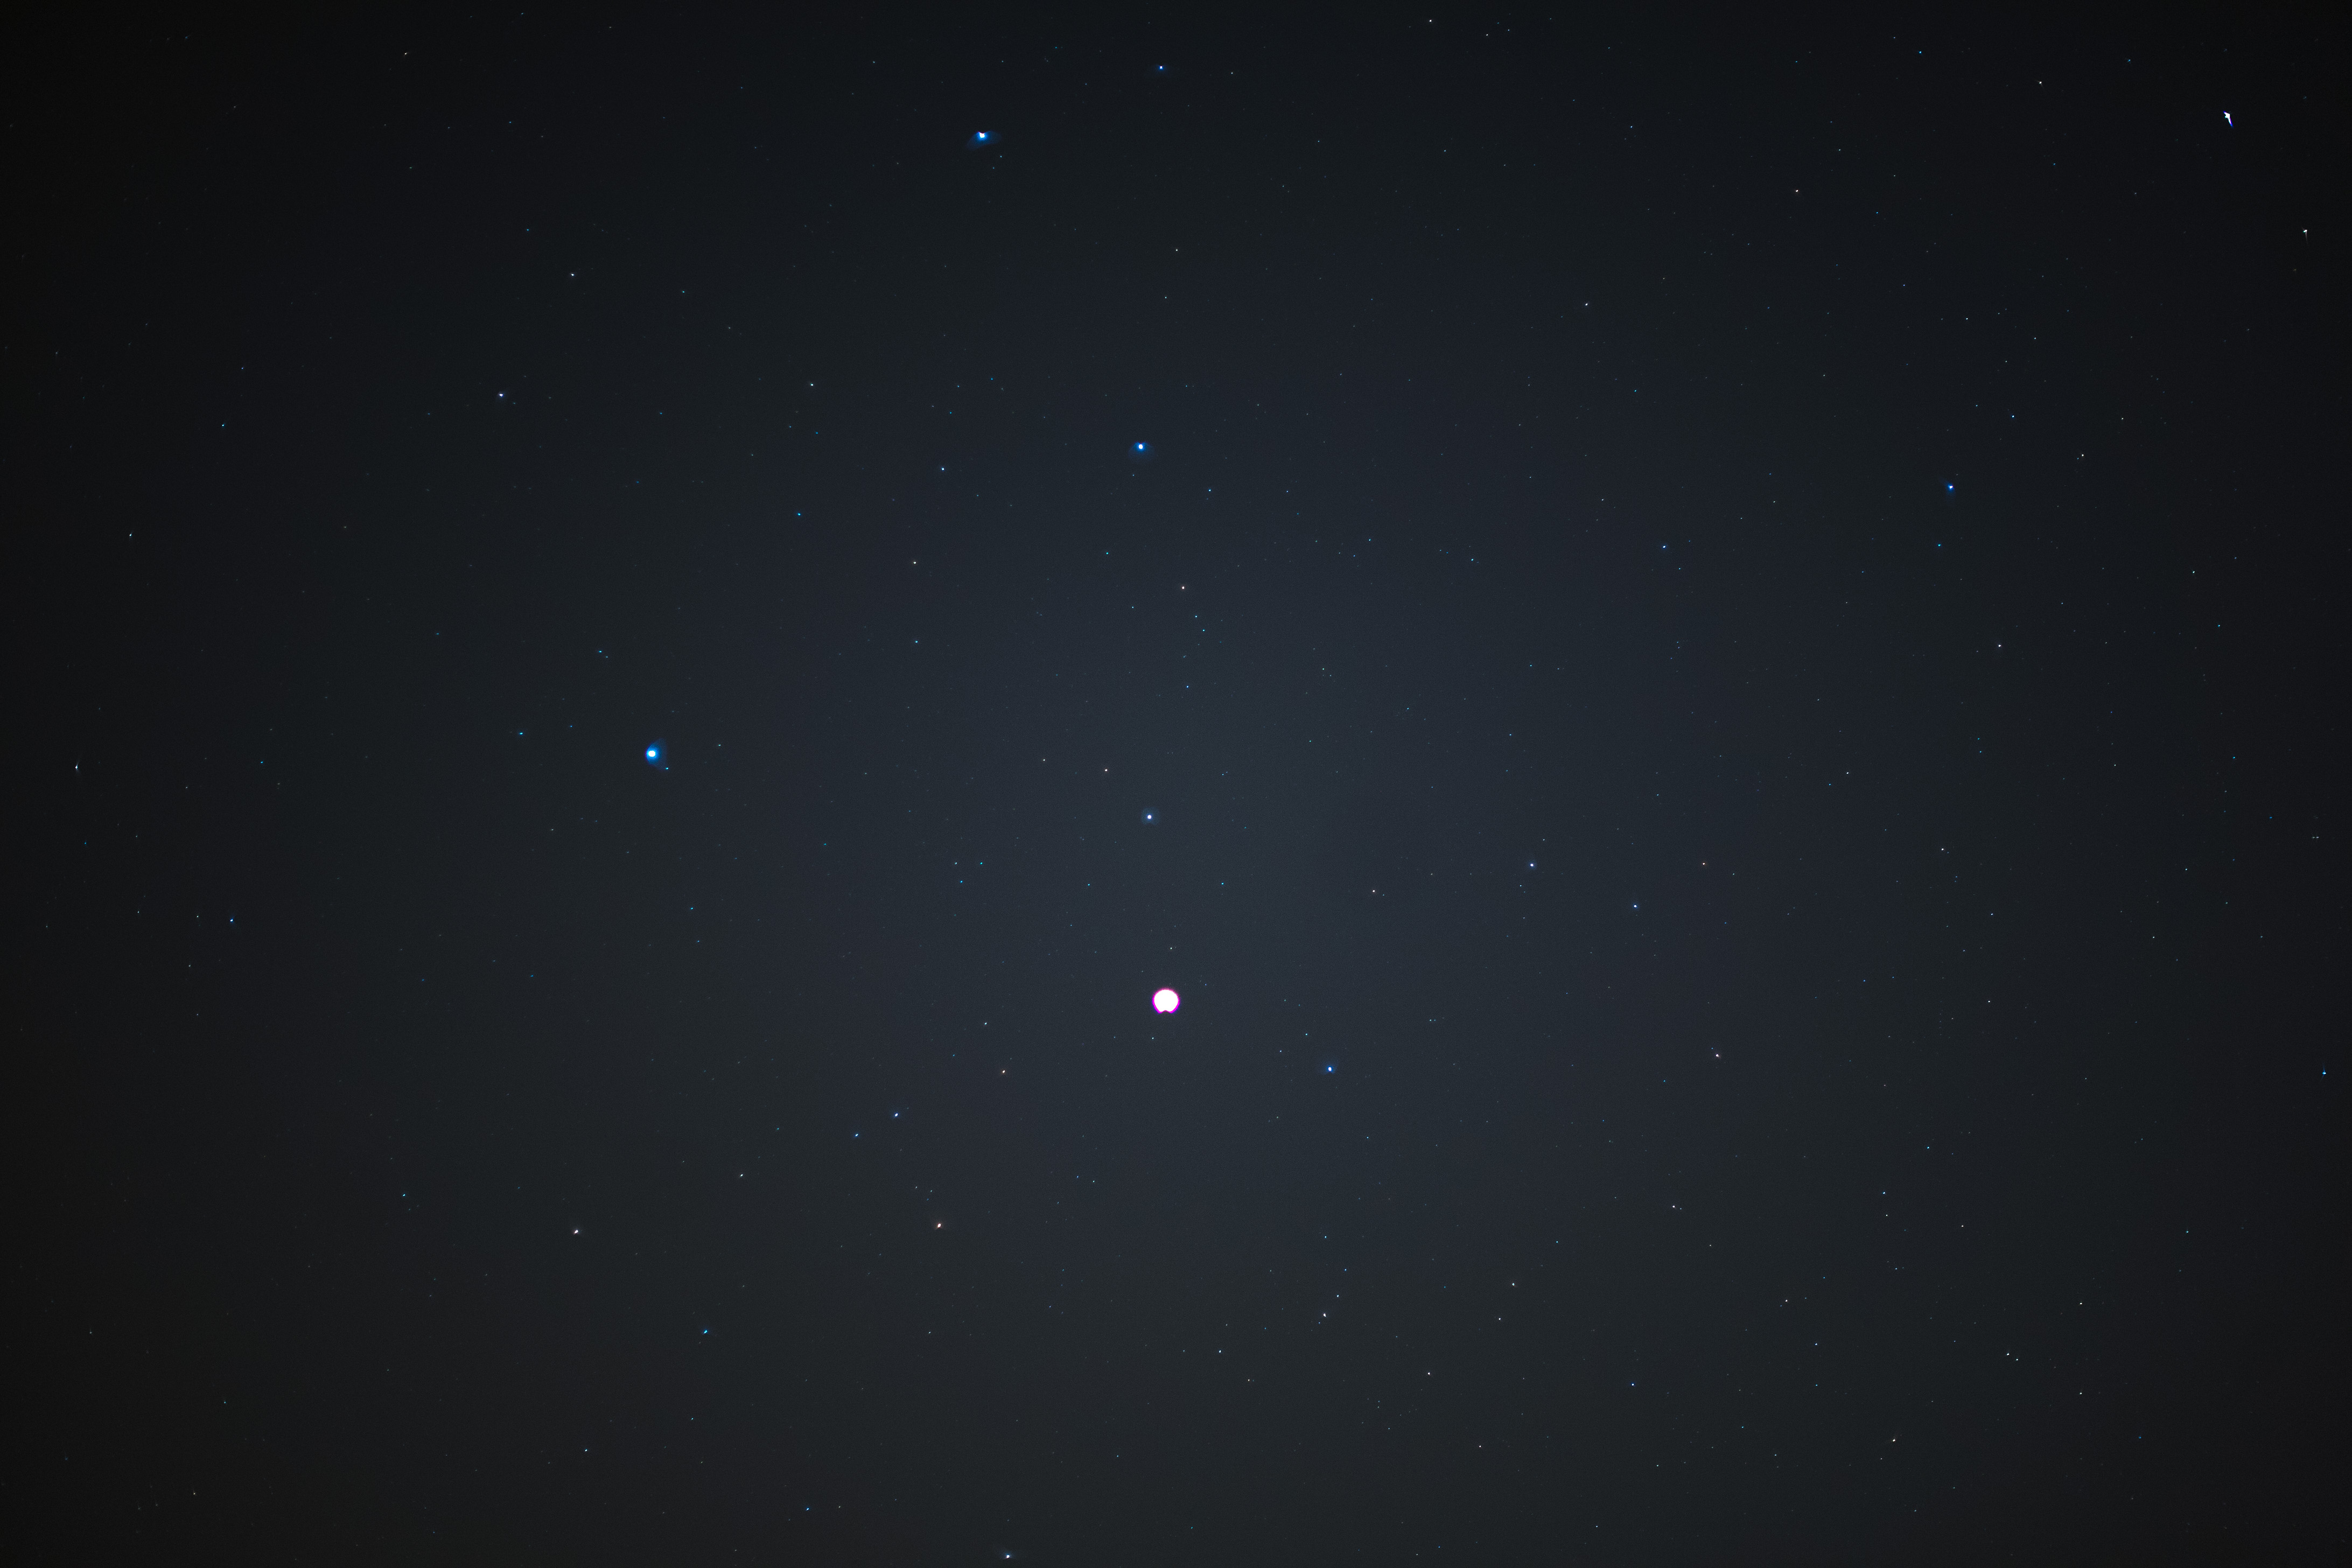
From a star trail image I learned that my hand filed ring was not exact parallel.
Because of this I made now with my lathe a copy of this ring with better parallelity:
And now the new star trail image, much better:
Further example pictures
Iris full open
: 1, 2, 3, 4, 5, 6, 7, 8, 9, 10, 11, 12, 13, 14
Iris stopped down
: 1
Now I have made an adapter to adapt Minolta MD / MC lenses to Canon EOS EF mount - with easier and most time reversible modifications of the lens.
More information about conversion of this lens on the WWW:
Rokkor 58/1.2 (58/1.4 is more or less the same) conversion with M42 adapter to Canon EF mount by Paul Yates
Minolta MC-Rokkor PF 58mm / 1.4 converted to Canon EF , Koji Kawakami
Minolta MC-Rokkor PG 58 / 1.2 modified toSony / Minolta AF Bajonett, Arkku
Minolta MC Rokkor 58 mm f1.2 conversion to Minolta / Sony AF Mount, Georg Pillwein
Minolta 58 mm f/1.2 Rokkor altered to Minolta / Sony, Shao Zhang
Minolta MC-Rokkor 58 f/1.2 adapted to a Minolta AF camera, Peter Ganzel
Minolta MC 58 / 1.2 and 58 / 1.4 conversion kit to Canon EOS EF-Mount , Jim Buchanan
Minolta 58 mm / 1.2 stripped down , Pete Ganzel
As usual: You do all at your own risk!
Please visit my own work site!